Want the done-for-you version?
The Web Designer’s Project HQ Template gives you the dashboard, projects + tasks views, and the clean structure already built — so you can start using it today instead of building from scratch.
The real problem: your workflow is in 17 tabs
If web design projects were only design and build, we’d all be living our best lives.
But that is not what actually makes projects feel chaotic. It is the in-between stuff.
It is the “Where did they put the logo?” scavenger hunt. It is approvals happening in DMs. It is feedback living in five places at once.
Here is what that looks like in real life:
- The client sends the brand photos in an email thread from two weeks ago.
- The approval happened in a voice note, not in writing.
- The “I’ll totally remember this” decision never gets remembered.
- The task list exists… but it is not connected to the files, the notes, or the context.
That is why Notion works so well for project management. Not because it is a fancy to-do list, but because it can hold the whole project in one place:
- the real-life messy middle
- tasks
- assets
- decisions
- timelines
Quick clarity: Notion is best when it is the hub for the project plan. If your project management is really “a task list over here + notes over there,” it will keep feeling fragile.
Notion solves the biggest project management problems for web designers
Most web designers are not struggling because they do not know what to do.
They are struggling because the information is scattered.
A Notion Project HQ fixes the exact pain points that make projects drag out and feel heavier than they should.
1) You stop hunting for client info
Instead of searching email, Drive, your notes app, and whatever folder you named “client stuff FINAL FINAL,” you open one Project HQ and everything is there.
Example situation: It is Tuesday morning, you are about to start the homepage, and the client says, “I sent the brand photos already.” You are 90% sure they did, but you cannot remember where.
In practice, this means one place to save:
- The client’s preferred name and contact info
- The Drive folder link (or Dropbox, or whatever they use)
- Brand files and logins (saved securely and responsibly)
- Meeting links and call notes
- “Where are we at?” status updates
2) You stop re-explaining the process on every project
When you run projects from a template, your workflow becomes consistent.
Example situation: A new client asks, “What happens after I pay?” and you realize you are about to type a five-paragraph explanation you have typed 30 times.
That consistency means:
- fewer missed steps
- fewer last-minute scrambles
- fewer “Wait… do we do this now?” moments
And for the client, it creates a calmer experience because the process is visible and repeatable.
3) You stop losing decisions (and redoing work)
A clear “Notes + Decisions” area saves you from revision loops.
Example situation: The client says, “I thought we agreed on the other headline,” and now you are digging through Slack, email, and Loom comments trying to prove you are not making it up.
If the client approved something, you know where it lives.
If the client changed their mind, you can see when and why.
This is one of those unsexy system pieces that quietly saves hours.
4) You can share one link with a client instead of 10
This is the part that makes everything feel professional.
Example situation: The client emails, “Can you resend the link to the content doc?” and you realize there are three different docs you have sent them over the last two weeks.
A client portal-style page (or a shared “Client View” inside your HQ) becomes the place you send them for:
- where to upload things
- what you need
- what is next
- what is waiting on them
Client experience win: When clients do not have to guess where to find things, you get fewer “Can you resend that?” emails and fewer delays.
What “Notion project management” looks like (Project HQ style)
Project HQ is not “make a database and hope for the best.” It is a repeatable workspace you spin up for every client.
Think of it like this:
- Notion is the hub.
- Your Project HQ is the home base for one client project.
- The databases are the engine underneath.
Here is what a Project HQ holds (and why you will actually use it):
- The approvals / waiting: the “what are we blocked on?” section.
- The overview: the “what are we building and why” anchor.
- The tasks: the execution list, filtered to this project so it stays readable.
- The notes + decisions: the “no more re-litigating” section.
- The assets + links: the “I refuse to search for this again” section.
A simple Project HQ page structure you can copy
If you want a clean, Notion-first layout that works for almost every web design project, start here:
Project Overview
- Scope summary
- Goals and success criteria
- Target dates
- Key links
Tasks (filtered view)
- Your tasks database view filtered to the current project
- Grouped by phase (so it does not feel like a 200-line scroll)
Client Needs + Uploads
- What you need from the client right now
- Upload links
- Approval items
Notes + Decisions
- Meeting notes
- Decision log
- Open questions
Assets + Links
- Drive folder link
- Brand files
- Figma link
- Staging URL
I don’t want to DIY!
If you do not want to DIY this: this is exactly what the Web Designer’s Project HQ Template includes — the dashboard layout plus the Projects + Tasks views, already connected and ready to use.
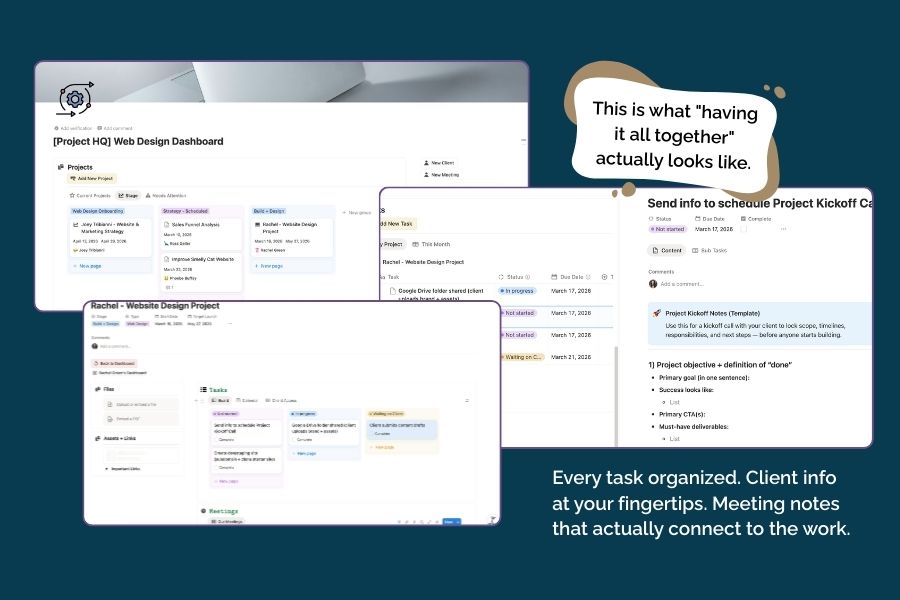
A real-world example: what’s inside “my Project HQ template”
Your dashboard-style template is the reason this whole workflow feels calm. Instead of opening Notion and immediately getting sucked into the “where do I click first?” spiral, you land on one page that shows you what is active and what needs attention.
In the Project HQ Dashboard template, the layout is intentionally simple: quick actions at the top, then two core areas you work from every day (Projects and Tasks), plus a BACKEND page that keeps the structure out of sight so the dashboard stays clean.
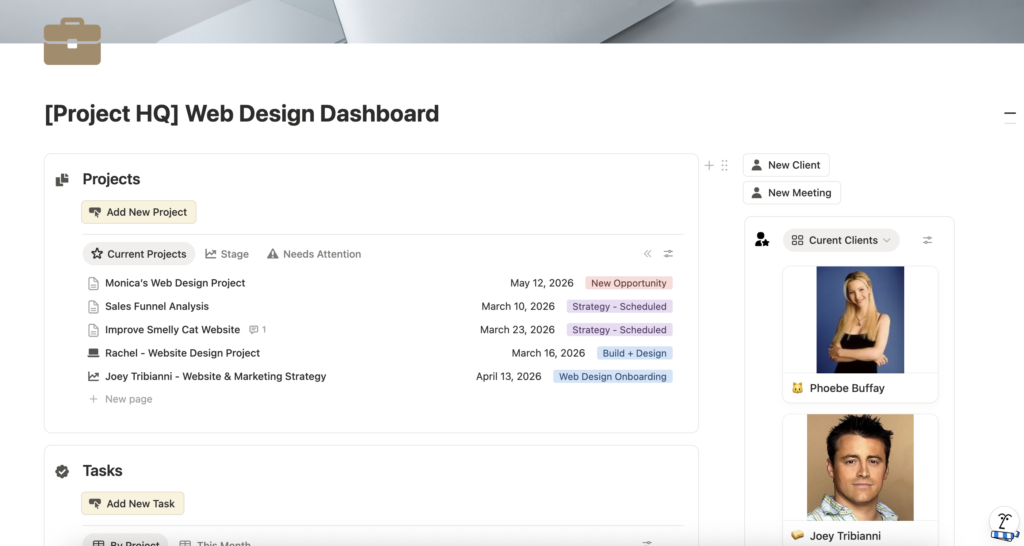
Dashboard page with quick-action buttons
The buttons are your shortcut layer. They are there so you can do the repeatable stuff without hunting around your workspace.
In practice, that looks like clicking a button to create a new project page, spinning up your standard project structure, and then moving right into the work. You can also use buttons to add tasks from your web design checklist, capture a meeting note while it is fresh, or log an approval item so it does not disappear into “I’ll remember that later” territory.
Projects section (database view)
The Projects callout holds a view of your projects database, right on the dashboard, so you can see what is active at a glance. This view is not meant to be a scrapbook of every project you have ever done. It is meant to answer one question quickly: “What am I actively responsible for right now?”
A clean Projects view usually includes the basics that help you make decisions fast, like the project status, target dates, and the next milestone.
Tasks section (database view)
The Tasks callout is where the day-to-day work lives. Because the tasks view sits directly on the dashboard, you can open Notion and immediately work from a short, filtered list instead of scrolling through an overwhelming master database.
This is also where your system starts doing the heavy lifting for you. When tasks are related to a project (and organized by phase), you can stay focused on the current stage of the build instead of staring at everything that could possibly happen from kickoff to launch.
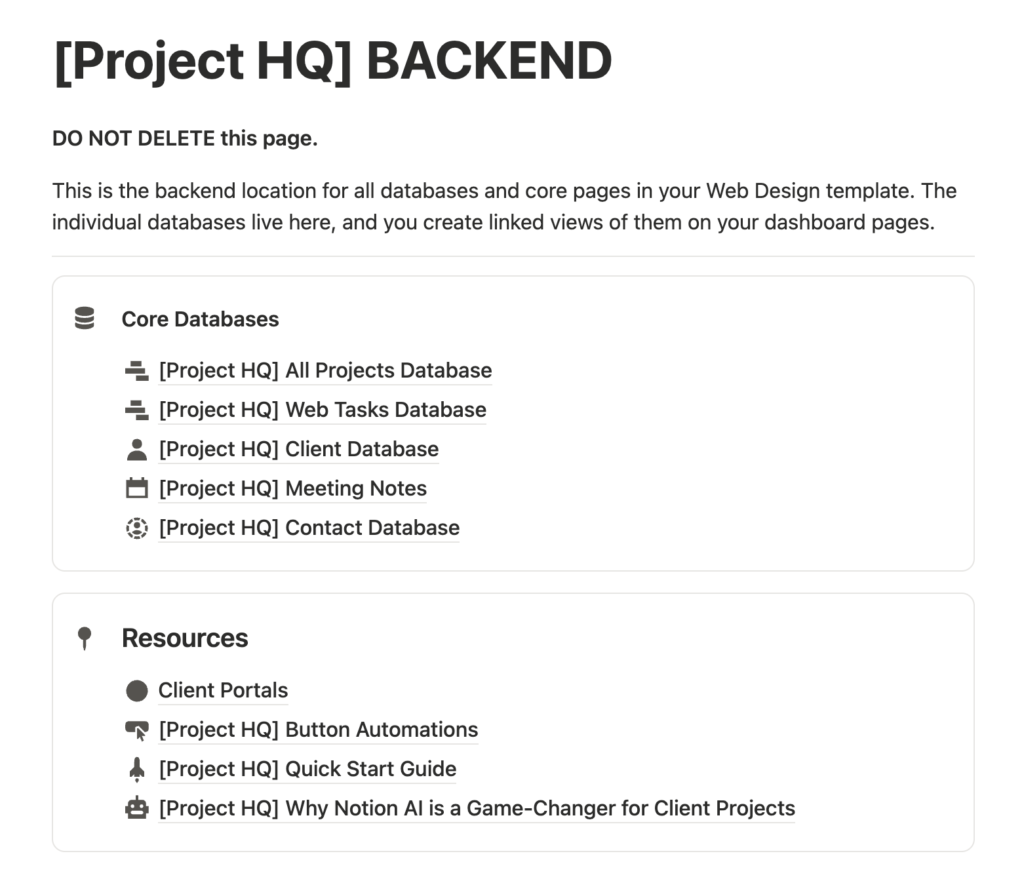
BACKEND subpage
The BACKEND subpage is where the “engine” lives: the databases, templates, and supporting views that power the dashboard.
Keeping that structure in a separate page is what makes the dashboard feel calm. You still have a robust system, but you are not forced to look at the wiring every time you open Notion.
First step: set up the essentials (so the template actually works)
This is the non-negotiable part: a pretty dashboard does not help if it is not connected to real databases.
If you want to build this yourself, you need a few core pieces (and you need them connected correctly).
The Notion essentials (DIY route)
At minimum, you want:
A Project HQ template This is the page layout that drops in your sections (overview, tasks, assets, notes, approvals) so you are not rebuilding your process every time.
A Projects database (each project is a page) This is where you track the project-level info: status, target launch date, client name, links, and anything you want at a glance.
A Tasks database related to Projects This is what makes it real project management. Every task belongs to one project so you can filter tasks inside the HQ and keep your brain quiet.
Watch-out: If your Tasks are not related to Projects, your views will get messy fast. That relation is what makes filtered “Project tasks” views possible.
Done for you route
If you want to skip the setup entirely, grab the Web Designer’s Project HQ Template. It gives you the dashboard layout and the connected database views so you can start using the system right away.
The workflow: how to run a web design project using a Project HQ
Here is what this looks like in real life.
Not theory. Not “set up a dashboard and pray.” Actual day-to-day usage.
1) Start the project with the template (so you are never starting from scratch)
When a new client is confirmed, you create a new project using your template.
That template gives you your standard sections right away:
- Overview
- Tasks (filtered to the project)
- Assets + links
- Notes + decisions
- Approvals / waiting on client
Now the project has a home. And you do not have to hold the process in your head.
2) Use phases so the project stays readable
The reason tasks get overwhelming is because they are all visible at once.
Instead, run your tasks in phases. For web design, something like:
- Onboarding
- Strategy + sitemap
- Design
- Build
- Content + QA
- Launch + handoff
In Notion, this can be as simple as a “Phase” select on Tasks and a view grouped by Phase.
This is how you keep the detail without creating chaos.
3) Make the client’s part obvious (so you are not constantly chasing)
This is where a Project HQ becomes a client experience tool, not just a task system.
Inside the HQ, create a very obvious section that answers:
- What I need from you right now
- Where to upload it
- What is next
- What you are approving
Even if you are not giving clients access to your whole system, you can still use the HQ to generate clean, simple “client update” information.
4) Keep task detail, but in checklists (not in a 200-line task list)
This is the sweet spot.
For most web design work:
- Create one main task (example: “Design homepage”)
- Add a short checklist inside it (wireframe, first draft, revision, final)
That gives you consistency without turning your task list into a novel.
5) Track approvals and decisions like your timeline depends on it (because it does)
Most web projects do not stall because you forgot how to build the site.
They stall because approvals and content are unclear.
Inside your HQ, keep a simple approvals area that shows:
- what is waiting
- where it lives
- what “approved” means
And when a decision is made, put it in Notes/Decisions.
Future-you will be obsessed with past-you for this.
Why templates are the real game changer
Templates are not only about repeating tasks. They are about making your workflow repeatable.
The same layout. The same phases. The same place to put things.
That consistency:
- protects your time
- improves the client experience
- reduces missed steps
- makes it easier to delegate later
Next steps
Decide if you are going DIY or done-for-you.
If you are DIY:
- Create (or confirm) your Projects ↔ Tasks relationship so every task belongs to a project.
- Make sure your Project HQ page includes: overview, tasks view, assets, notes/decisions, approvals.
- Add one client-facing “What I need from you” section and test it on your next project.
If you want the shortcut, grab the Web Designer’s Project HQ Template and customize it to match your workflow.